How to Make a PFP Step by Step: Pick Features, Choose Colors, Export PNG
Open the free square face generator and follow along.
The traits you can tune
| Trait group | What the tool offers | Why it matters |
|---|---|---|
| Hair style | Dozens of cuts, from bob to spiky | Frames the face and sets the vibe first |
| Eyes and eyebrows | Shapes, sizes and 12+ colors | The strongest personality lever on the face |
| Mouth and lip color | Smiles, smirks, open mouths | Reads as the mood of the whole avatar |
| Glasses and hat | Frames, caps, crowns and more | The fastest way to make a face look like you |
| Clothing and collar | Outfit colors and necklines | Extends the palette below the face |
| Beard and extras | Beards, earrings, blush, freckles | The details that separate two similar faces |
Step 1: Set Up Your Square Canvas in the Generator
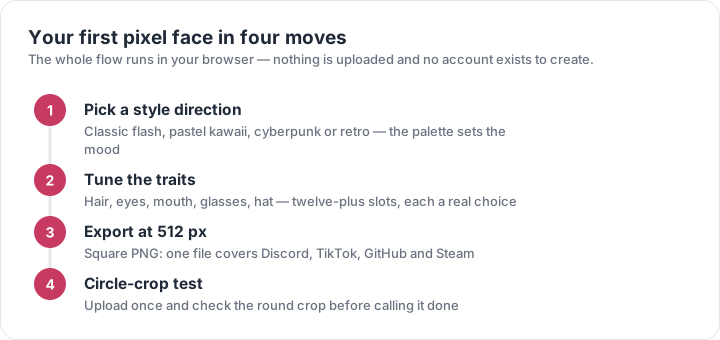
Open the free online square face generator and choose a style: Classic Flash for bold outlines and glossy 2000s nostalgia, or Modern Pixel-Art for crisp 16-bit blocks. Set canvas to 512 x 512 px; this exports cleanly to most platforms and scales down without blur. If you want a sharper pixel look, choose a 32 x 32 or 64 x 64 grid and keep "pixel perfect" on. Turn on transparent background if you plan to add a platform-safe color later. Use the live preview at 128 x 128 px to check readability. Start with a neutral base face, then lock the canvas so you don't accidentally resize it. This takes about 30 seconds and prevents rework later. Save a draft before moving to features.
Step 2: Pick Features That Read at Small Sizes
In the feature panel, build the face in this order: head shape, eyes, brows, nose, mouth, hair, then accessories. For PFPs, exaggeration works: choose eyes that are at least 2 grid blocks tall and a mouth 3–4 blocks wide. If you use the 32 x 32 grid, keep hair silhouettes to 6–10 blocks so they stay clear at 48 px. Use symmetry tools for glasses, earrings, or face paint, but offset one item—like a 1-block scar or headphones—to make the avatar memorable. Randomize once or twice for ideas, then manually adjust. Lock finished layers to avoid moving them. Preview at 64 px and 128 px: if you cannot identify the expression in one second, simplify. Aim for 3–5 distinct features, not 10.
Step 3: Choose a Color Palette With Contrast
Select an 8–12 color palette: 1 background, 2 skin tones, 2 hair tones, 1 eye color, 1 accent, and 2–3 neutrals. In Classic Flash style, use brighter highlights and a subtle gradient; in pixel-art style, stick to flat fills and 1-pixel shading. Check contrast by converting the preview to grayscale: the face should still separate from the background. For dark platforms, use a light background like #F2F2F2; for light platforms, use a dark background like #1A1A1A. Keep the accent color under 20% of the image so it pops. Avoid more than 3 hues unless the character is intentionally chaotic. Test the palette at 48 x 48 px—if the eyes disappear, darken the outline or lighten the iris. Save your palette hex codes for future avatars.
Step 4: Export a Clean PNG at the Right Size
Export as PNG, not JPEG, to keep hard pixel edges and transparency. Use 512 x 512 px for general use, 1024 x 1024 px for YouTube or print, and 400 x 400 px for LinkedIn. Keep the file under 1 MB; if it is larger, reduce to 512 px or run it through a PNG compressor. If you want a circular crop, leave a 40–60 px safe margin around the head so platform UI doesn't clip hair or ears. For pixel art, disable smoothing/anti-aliasing before export. Name the file clearly: square-face-pfp-512.png. Check the final PNG at 100% zoom and at 48 px. If the edges look blurry, you likely exported from a scaled preview—re-export from the original 512 x 512 canvas. Save both a transparent and solid-background version.
Step 5: Upload and Optimize for Each Platform
Upload the 512 x 512 PNG everywhere, then adjust per platform. Discord displays 128 x 128 px but accepts 512; keep the face centered. Twitter/X shows 400 x 400 px, so test the circle crop. Instagram profile photos display at 320 x 320 px; avoid important details near corners. Facebook uses 170 x 170 px on desktop, so simplify tiny accessories. TikTok displays 200 x 200 px, and YouTube accepts 800 x 800 px—use the 1024 px export there. LinkedIn recommends 400 x 400 px. After uploading, check each profile at mobile size. If the avatar looks muddy, increase outline thickness by 1–2 px and re-export. Update all platforms from the same master PNG so your square face PFP stays consistent.